WE WILL PAINT THE ENTIRE SKULL
Perhaps one of the most intimidating surfaces to paint is lava. Its a cross between fire and liquid, with charred black parts in-between. It doesn't need to be so daunting. We'll show you how its done.

Unleash your potential
With our workshops, you'll not only be able to render more accurately, but you will understand what you re seeing more clearly. .
Slow growth?
Not a problem. Even if you are stuck in a rut, we'll show you how to prevail in even your most challenging paintings.

This is Airbrushing Evolved
The beauty of painting can be found in the subtle details, elegant edges, and powerful contrasts in a surface. Mastery of this is not as difficult as you might think. The methods you will learn might not always be conventional, but they get results, and that's what counts.
Welcome to the next level
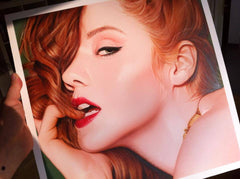
Imagine being able to create this painting with such realism that people mistake your painting for a photograph. We'll show you how!
What you will learn
01
Layout and composition
This is the most important foundation of any painting, yet it is the most overlooked. Here you will learn how to position your elements in its environment and make use of background negative space.
02
The 8 differences between Opaque and Transparent paint
There are a lot of opinions as to which is better. The answer is that each possesses unique characteristics which need to be considered first. You will learn all the differences, and when and why to use each.
03
Liquid hot magma
Learn about the appearance of different types of molten rock.
04
Matching with transparent colors
Matching color with a transparent paint uses a different technique than matching with opaque paint. Here we will show you how to match colors perfectly using only transparent paint.
05
How to use the Value Color Wheel set
Value is the most important component of color. Learn how Dru uses the value color wheel set to arrive at the right color for any project.
06
Eliminating the problem of simultaneous contrast
Simultaneous contrast is the illusion that colors touching each appear more different than they actually are. We will show you how to harness this problem with color discrimination and turn it into one of your most powerful assets.
07
Using a blade to correct mistakes
Most people wouldn’t believe that a blade can be used to make subtle adjustments or correct major errors. We will show you the best way to apply the blade.
08
How to avoid that cut-out look
It's often difficult to manage the transition between the object and the background. Learn how to place the subject in its environment, and not appear cut-out looking.
09
Understanding the glow of fire
We will take an in-depth look at how fire and hot surfaces emit light and how it defines a texture.
10
5 ways to use a hand shield
Use these different techniques to use the mask to make your painting better. Its simple and easy, yet few people know about these alternate techniques.
11
Your Tool Arsenal
It never hurts to have knowledge of other tools. Here we will introduce you to more great tools There are many tools that complement the airbrush, and we want you to be able to enjoy having them all in your arsenal.
12
Eraser techniques
Take what you already know about erasing and add to it. The eraser can be used to cut like a blade, or blend softly. We will show you how to get even more out of your erasers.
13
Extending your bladework
The blade is a powerful tool, but must be held in a very specific way to be effective. Here you will learn advanced methods with the blade for even greater realism.
14
Extra techniques for more realism
Certain types of fur are more difficult to render than others, and require a different approach. We will show it all to you, as well as some extra tips for greater realism.
15
Depth of field
One of the coolest effects is creating a sense of depth by varying the focus. We will show you how to make this work for you.
16
Navigating difficult transitions
Some complex transitions are a bit tricky to navigate. We will show you how to manage them so that your blends and edges enhance your painting.
17
Buffered Contrast Reduction (BCR)
We will teach you all about BCR .and how to use a reverse BCR technique. Its a great solution for managing complex contrast scenarios
18
5 ways to deal with the worst disasters in your paintings
Sometimes we make horrific mistakes. The trick is knowing how to deal with them, and hide them in the finished product. We will discuss the 5 options.
19
Alternative ways to match colors
Its difficult to paint anything accurately until you can really see it. We will teach you how to visually dismantle an object, then reassemble it on the painting surface.
What students are saying

I attended Dru's workshop with the hope of learning to paint, I left with the ability to "see" and a system that allowed me to develop my own understanding of painting and colours. Your system has given me the freedom to explore my own creativity.
Paul MacDonald
(Airvengers) Australia

Dru's teachings showed me how to create great detail and gave me the ability to achieve PHOTOREALISM in my artworks. Thank you for pioneering the world of photorealism in airbrushing, I doubt I would have got here without your long nights and many experiments .
David Naylor
Spain
Dru's workshop influenced the way I paint and gave me some new concepts, knowledge and skills to implement into the way I worked today I recommend it!
Mitch Lowther
(Airbrush tutor) Australia

Painting true-to-life textures
You will learn a lot of techniques in your workshop, but the most valuable lesson gained is for you to better understand and see the world differently.
We will give you the power to create or re-create reality with stunning photorealism, and at a level no other airbrush workshop in the world offers. A photorealist painter can easily paint in any style, from abstract to impressionist, and even mimic the old masters' paintings. The choices are limitless.
As artists, we take our inspiration from the visual world around us and re-create it on board, metal, or canvas. At the Blair School, we would like to show you how to do it more successfully.
Class Hours
Class begins at 9 am and ends at 5pm ( Eastern Standard Time). a 1-hour lunch break is held at 1 pm.
Learn more about Virtual classes, including Frequently Asked Questions. Click here for more information.
